You are now leaving our website and entering a third-party website over which we have no control.
How to Set Up a Pre-Authorized Purchase Plan in a Multi-Holding Account
Recurring contributions may help you reach your financial goals faster, even during market downturns. You can invest as little as $25 per transaction and adjust your contribution amount or frequency as often as you wish. To get started, sign in to the TD app.
Once you've signed in, here is a brief overview on how to set up a Pre-Authorized Purchase Plan.
1. Select Invest
2. Add Pre-Authorized Purchase Plan
3. Select Create New PPP
4. Enter transaction information
5. Review and finish transaction
For in-depth instructions continue reading.
Step 1: Select Invest
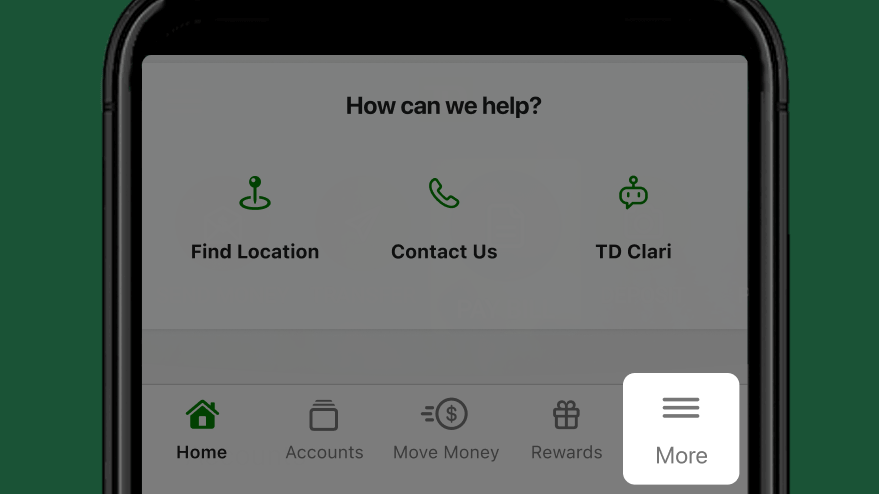
Select More from the Navigation bar.
Select Invest.
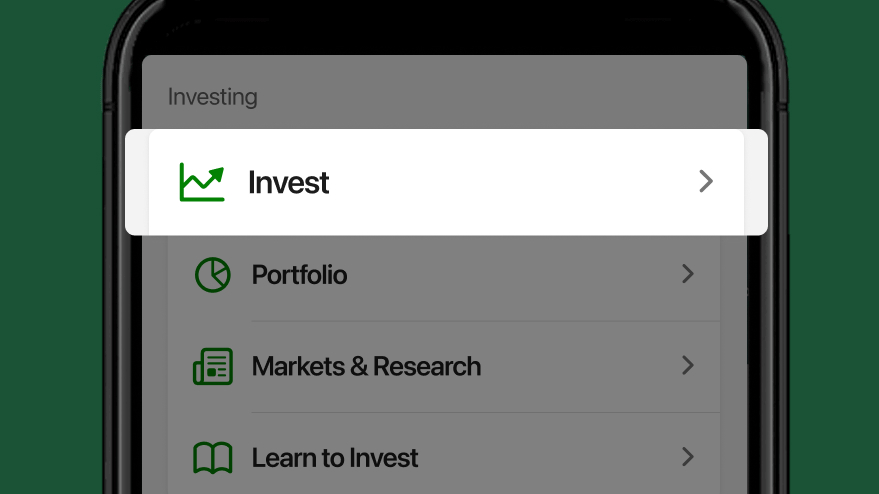
Step 2: Add Pre-Authorized Purchase Plan
From the Invest screen, select Pre-Authorized Purchase Plans from the PERSONAL SAVINGS & INVESTING section.
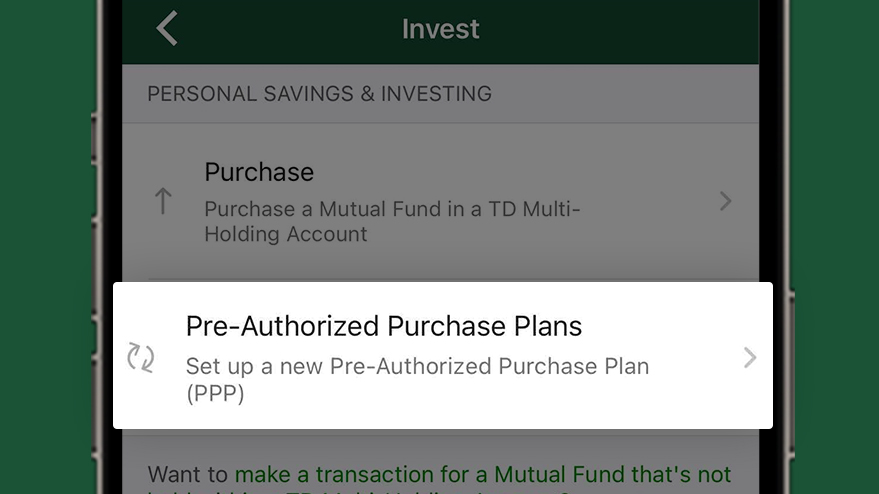
Step 3: Select Create New PPP

Select Add New PPP from the Pre-authorized Purchase Plans page.
Step 4: Enter transaction information
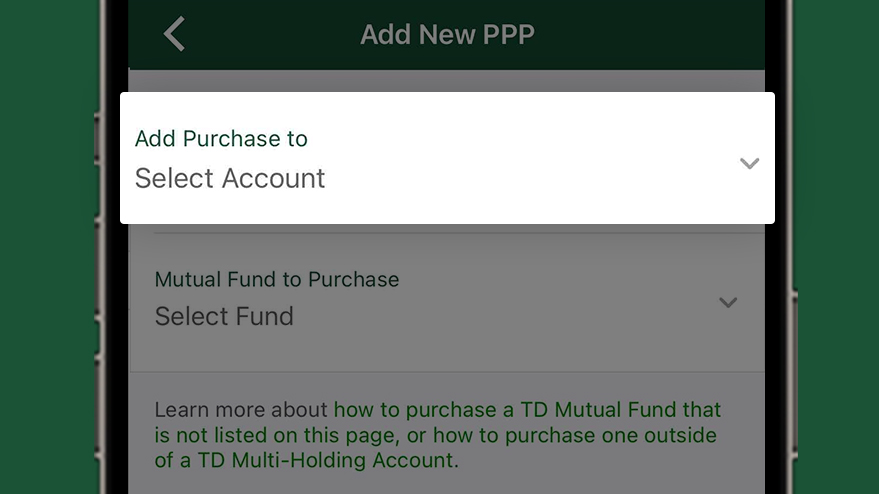
From the Add Purchase To drop down menu, select the account you wish to set up a Pre-Authorized Purchase Plan in.
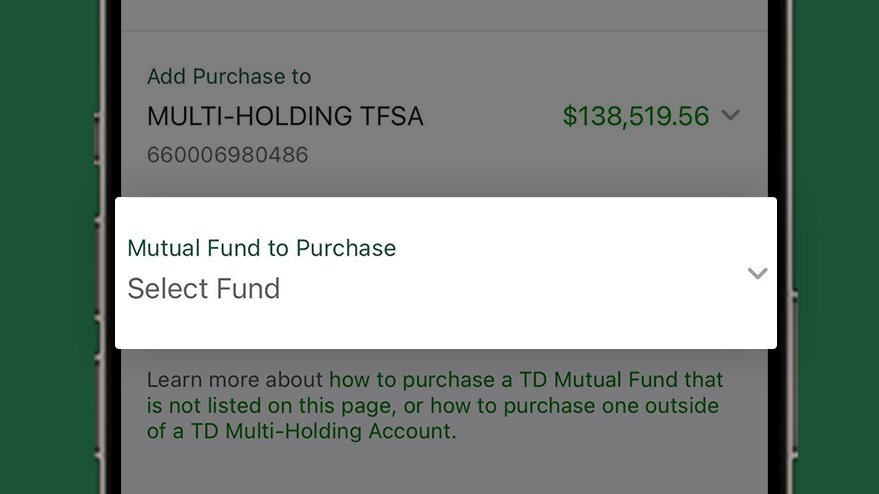
Then, from the Mutual Fund to Purchase drop down menu, select the Mutual Fund you would like to set up a Pre-Authorized Purchase Plan for.
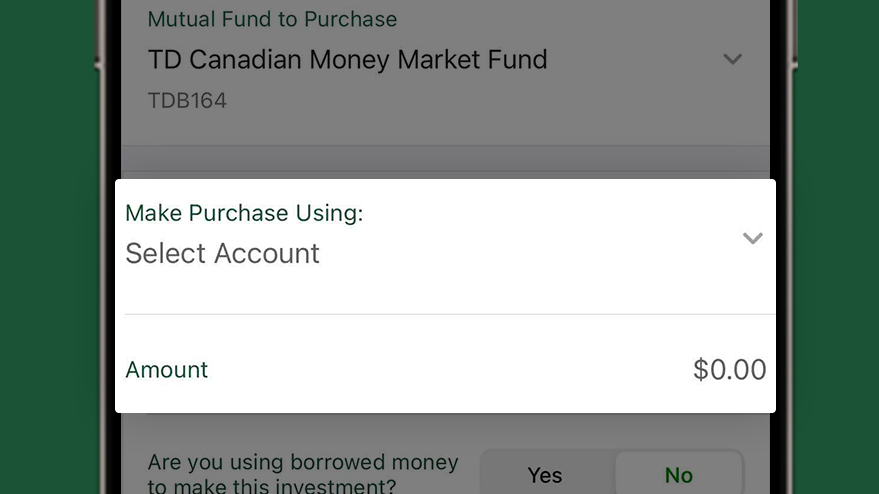
From the Make Purchase Using dropdown, select the account to draw money from.
In the Amount section, enter the amount of money you wish to contribute.
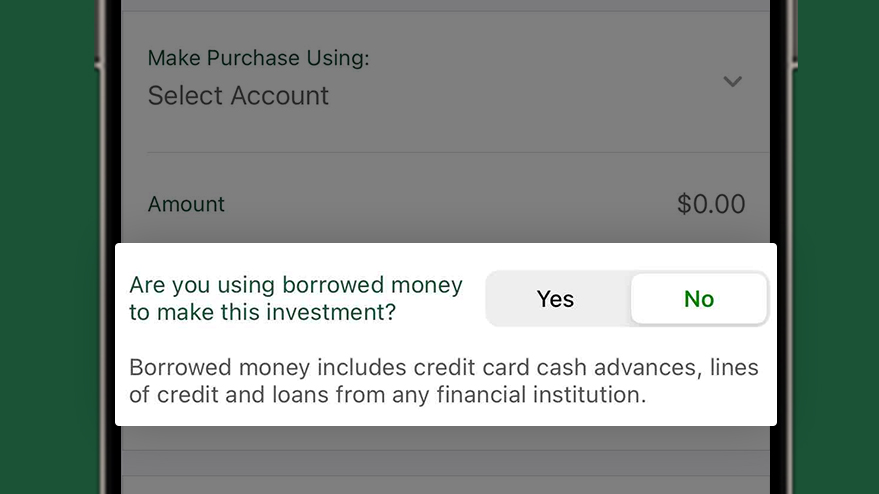
Select Yes or No from Are you using borrowed money to make this investment?
Keep in mind, investments cannot be purchased online using borrowed money.
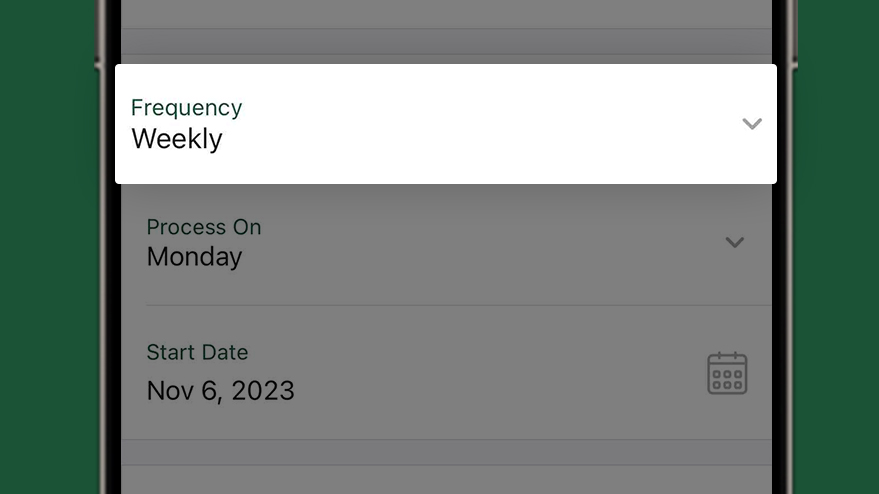
From the Frequency drop down menu, select your contribution frequency.
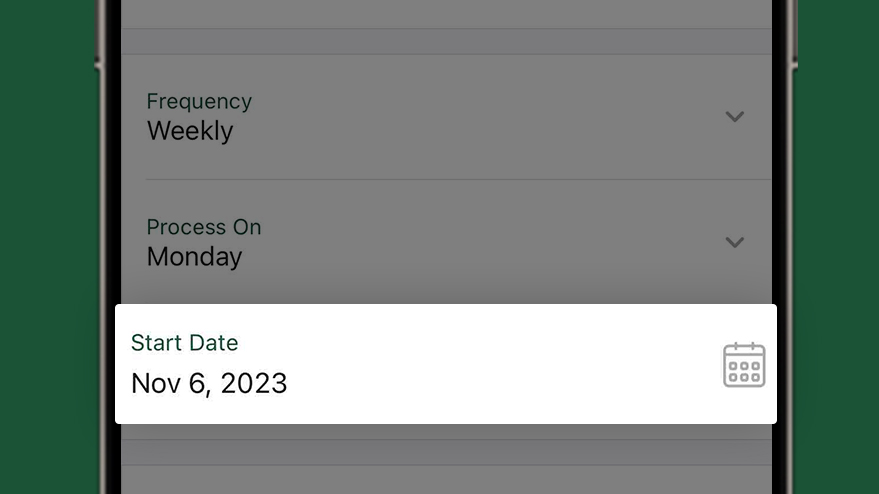
In the Start Date field, enter the date you want your contribution to start or, select a date from the calendar feature provided.
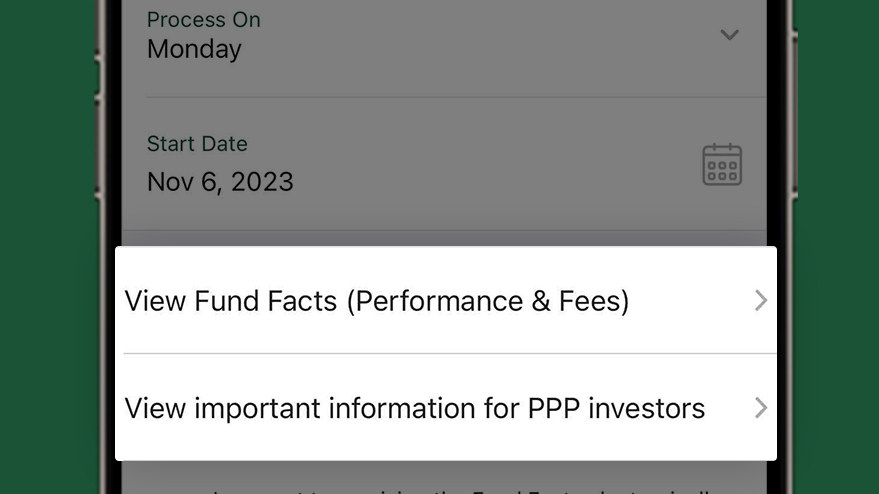
View Fund Facts to review important details about the fund’s holdings, risk factors, past performance, and costs.
View important information for PPP investors to learn about the other information related to your investment.
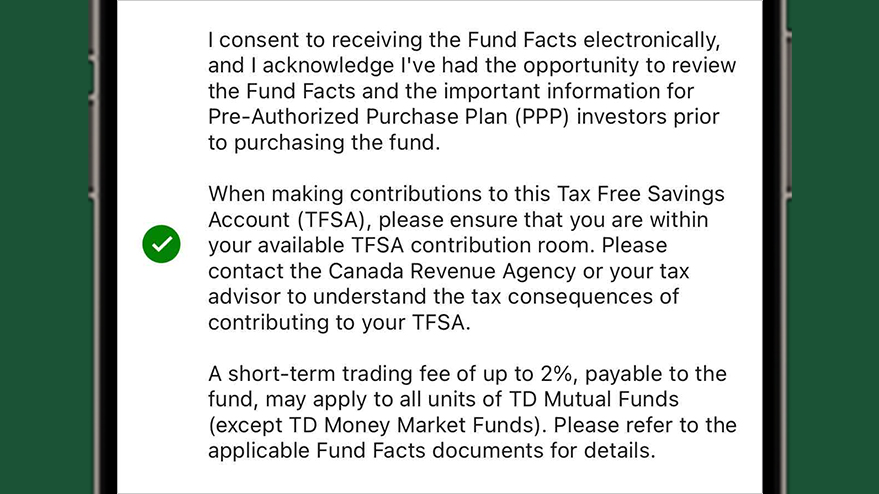
Read the Fund Facts Electronic Agreement and select I consent.
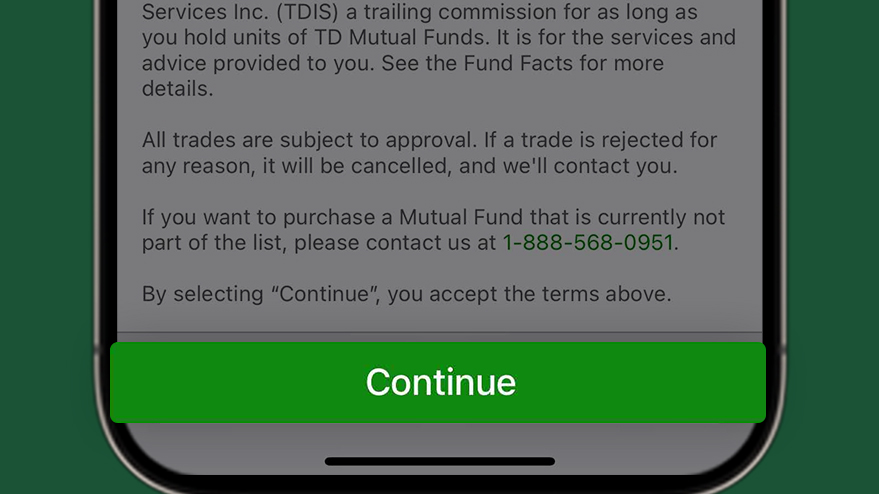
Select Continue.
Step 5: Review and finish transaction
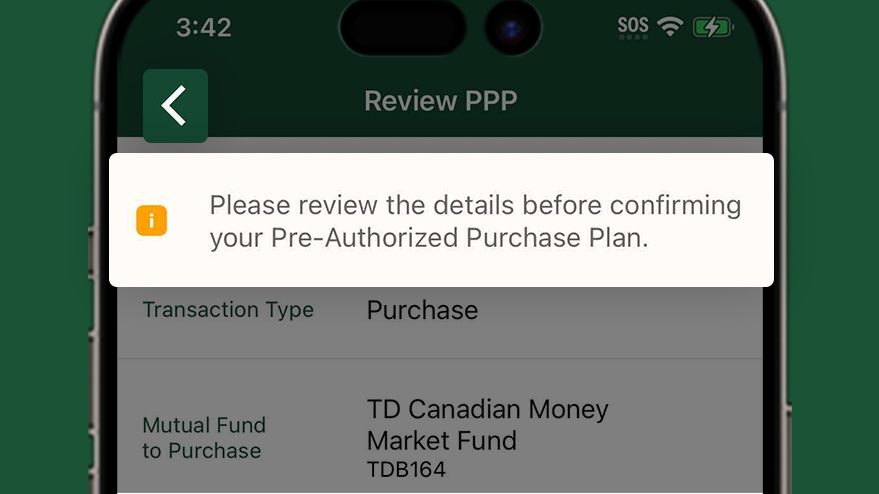
You must review all information, to ensure that it is accurate.
If you need to change anything, simply select the Back navigation at the top of the screen.
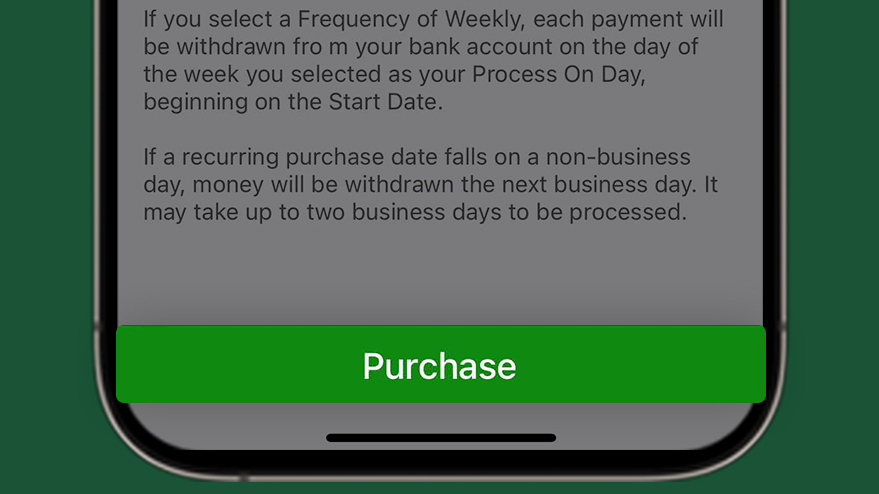
If everything is satisfactory, select the Purchase button to confirm your purchase.
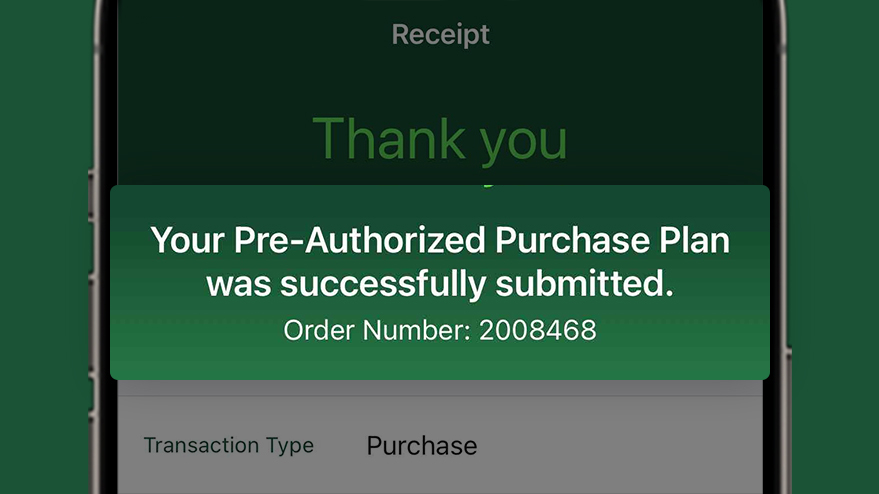
You'll receive a confirmation number for your records.
Congratulations! You've completed this tutorial.