You are now leaving our website and entering a third-party website over which we have no control.
How to send money within Canada with Interac e-Transfer® on EasyWeb
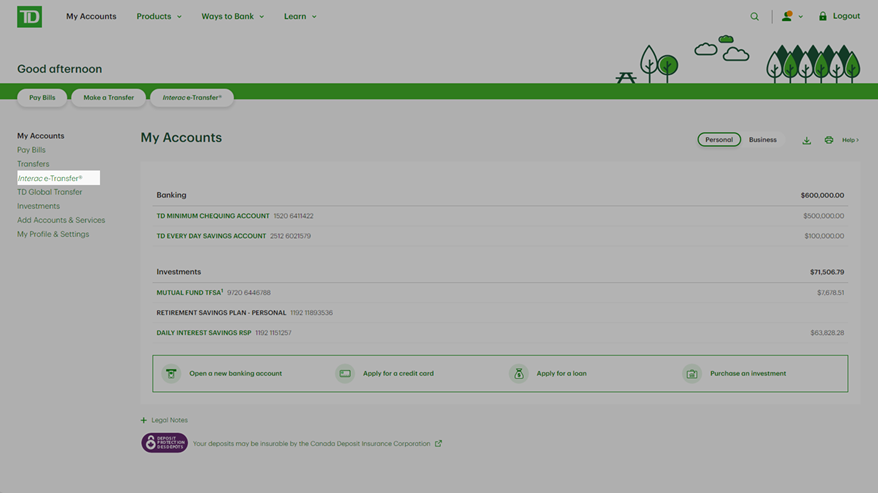
With Interac e-Transfer®, you can send money within Canada to a person or a business. All you need is an email address, or a valid Canadian mobile number – and an eligible bank account with a participating Canadian financial institution. To get started, sign in to EasyWeb.
Once you've signed in, here is a brief overview on how to send money using Interac e-Transfer®
1. Access Send Money
2. Enter transaction information
3. Set up security question
4. Review & finish transaction
For more in-depth instructions, learn more below. If you want to send money using Interac e-Transfer® with the TD app on your mobile device, review the instructions here.
Step 1: Access Send Money
From the left-hand navigation menu, select Interac e-Transfer®.
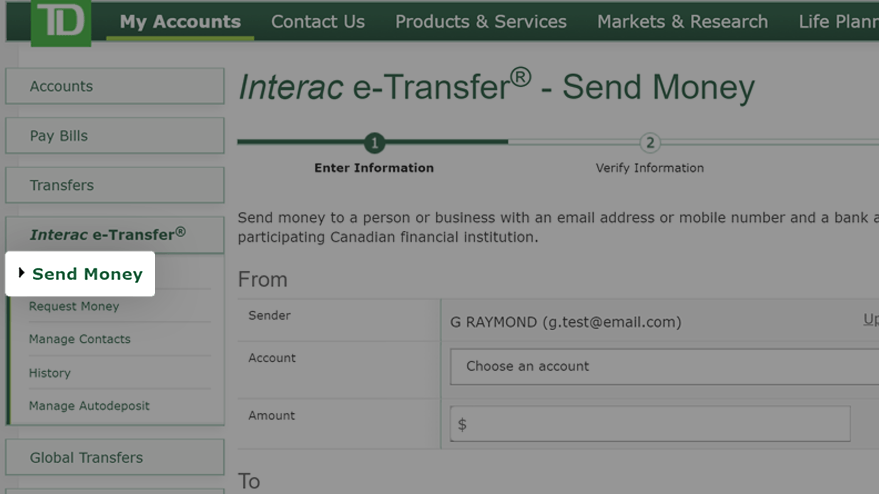
Check within the Interac e-Transfer® menu to ensure the Send Money option is selected.
Step 2: Enter transaction information
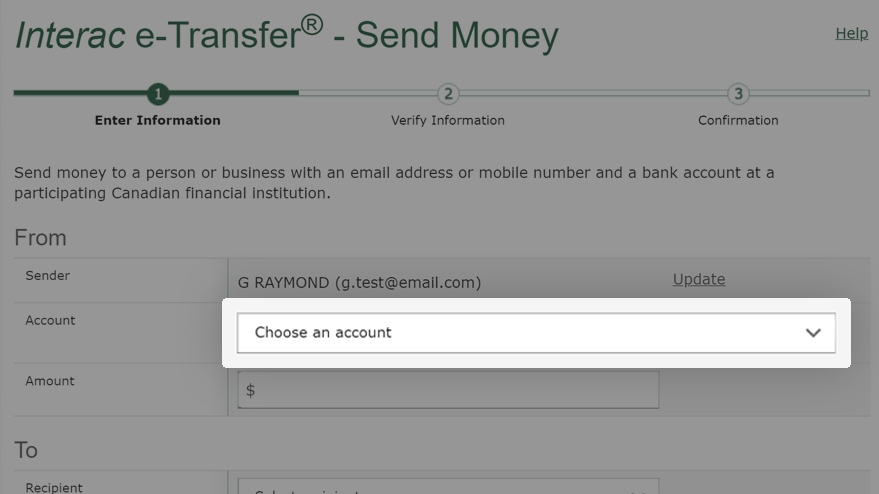
From the Account dropdown menu, select the account from which you wish to send money.
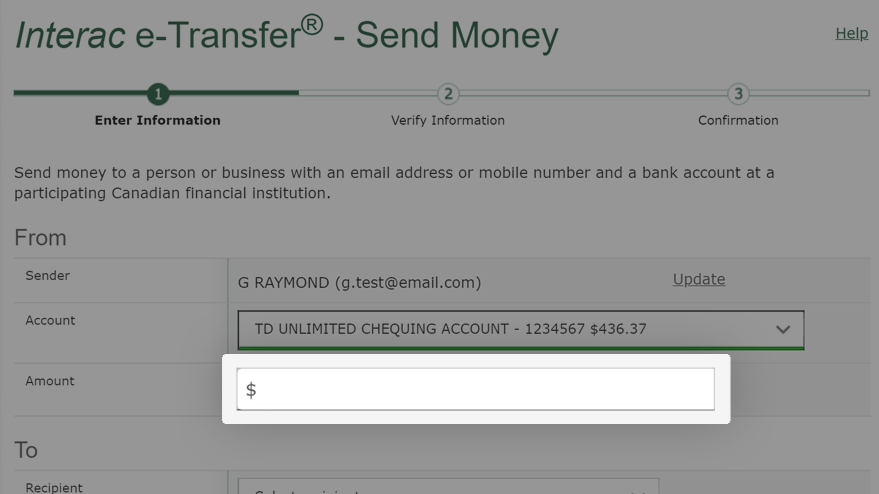
In the Amount field, enter the amount of money you wish to send.
Keep in mind, there are daily, weekly, and monthly maximum limits for sending and receiving money via Interac e-Transfer®.
You can find your send limits at the bottom of the page, in the Fees and Limits section under Maximum Amounts.
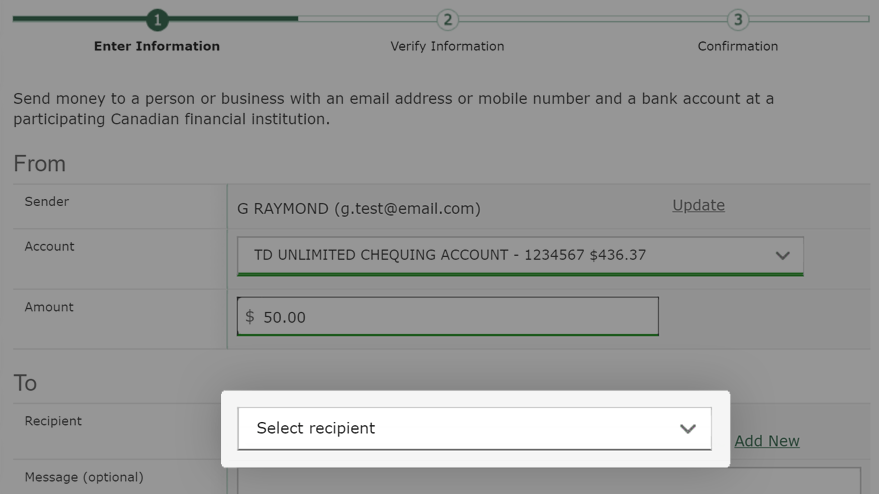
From the Recipient dropdown menu, select the person or business to whom you wish to send money.
If the recipient's name is not in your list, add it by selecting Add New. Then enter the recipient's name and valid email address and/or Canadian mobile number.
To make any changes select Update, to the right of the menu.
If your recipient does NOT have Autodeposit, advance to Step 3: Create a Security Question.
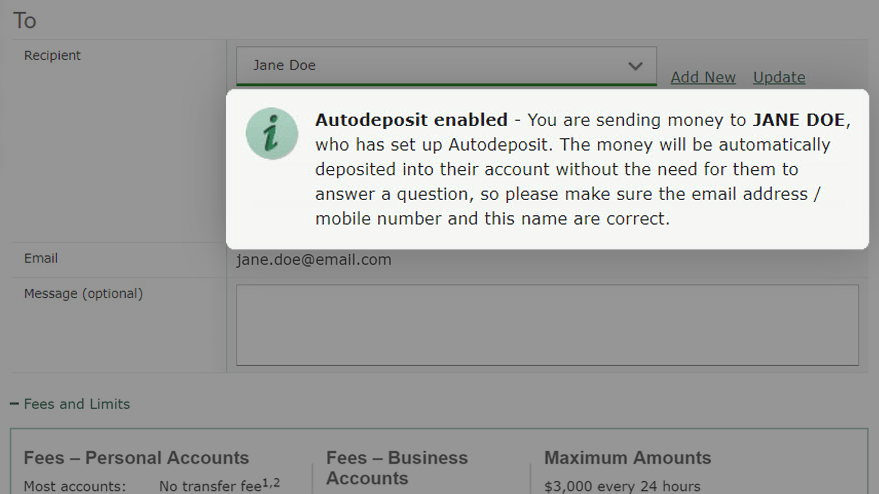
If the recipient has enabled Autodeposit from Interac e-Transfer®, there's no need for a security question and answer, as the money will be deposited to their account automatically.
It's crucial to ensure the name, email, and phone number displayed match the intended recipient as Autodeposit transactions can't be cancelled.
You may also choose to enter a short message.
Now, select the Next button, and skip to Step 4: Review and finish transaction.
Step 3: Create a Security Question
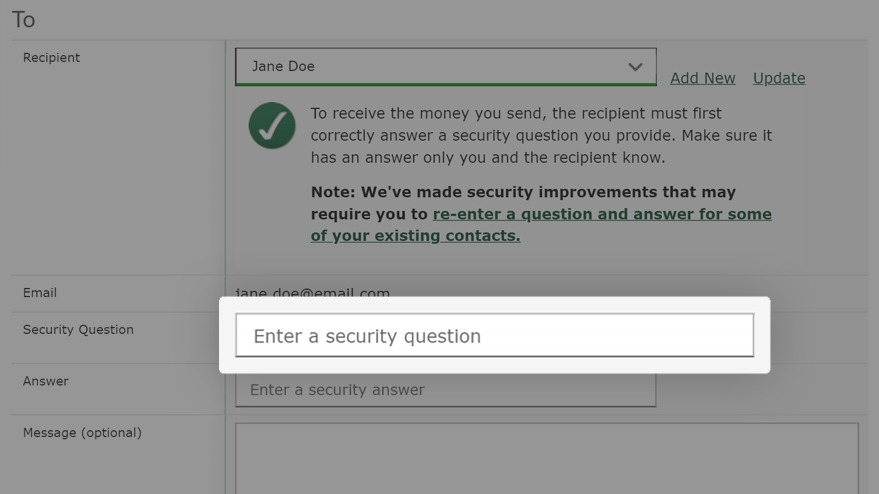
In the Security Question field provided, create an effective question that cannot be guessed, and that only you and the recipient can answer correctly.
Remember, the funds will be deposited to whomever can access the Interac e-Transfer® and correctly answer the security question, regardless of whether or not they are the intended recipient.
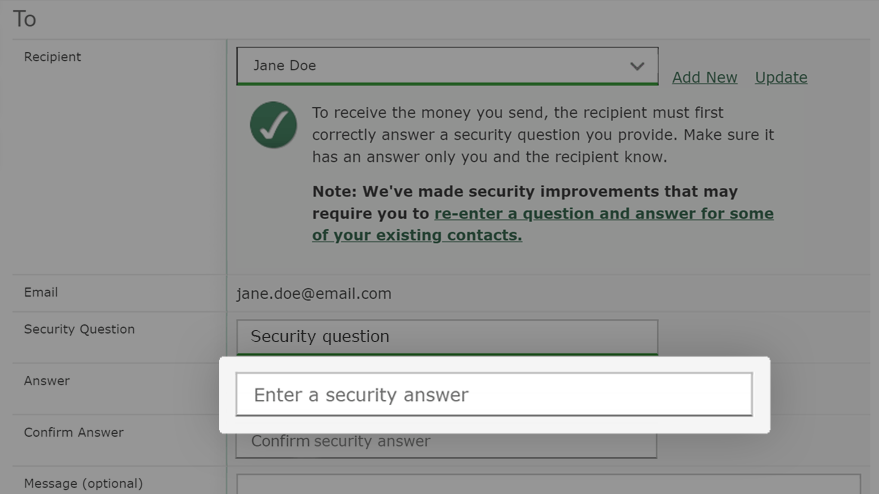
In the Answer field, type the answer to the security question you just created.
Answers may be between 3 and 23 letters and/or numbers in total. Special characters, such as @, #, $, can't be used.
You must keep the answer to your security question confidential at all times. Do not communicate it electronically (e.g. email, social media, etc.)
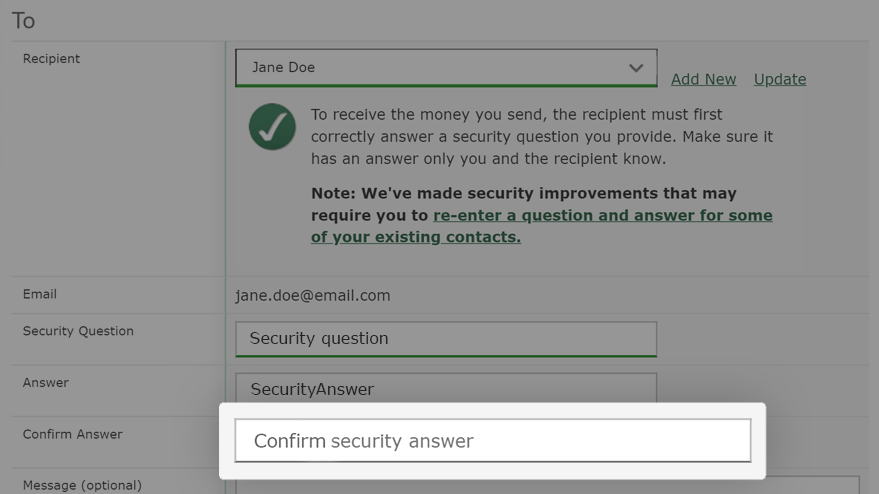
In the Confirm Answer field, re-type the answer to your security question.
If you would like to, you may include a message to the recipient.
Type your message into the Message (optional) field. To help keep the answer to your security question confidential, never include it in the message field.
Then, at the bottom of the screen, select the Next button.
Step 4: Review and finish transaction
You must review all information, to ensure that it is accurate and that it matches the intended recipient.
If you need to change anything, simply select the Back button.
If everything is satisfactory, then select the Send Money button.
You will see the confirmation number for the transaction.
The recipient will be notified by email or text message/SMS alerting them that you've sent them money using Interac e-Transfer®.
If the recipient has Autodeposit enabled for Interac e-Transfer®, the funds will automatically be deposited into their account. Otherwise, they will have to follow the instructions in the email or text message/SMS to deposit the money.
Congratulations! You've completed this tutorial.