 Canada
 US
US
You are now leaving our website and entering a third-party website over which we have no control.
How to add, edit or delete a Canadian payee on the TD app
To pay bills on the TD app, you'll need to add payees. A 'payee' is a company or organization you want to pay. You may also need to edit or delete payees. Log in to the TD App to get started.
Step 1: How to add a Canadian payee
To add a payee, you'll need the official payee name and payee account number. Both items can be found on a bill or statement.
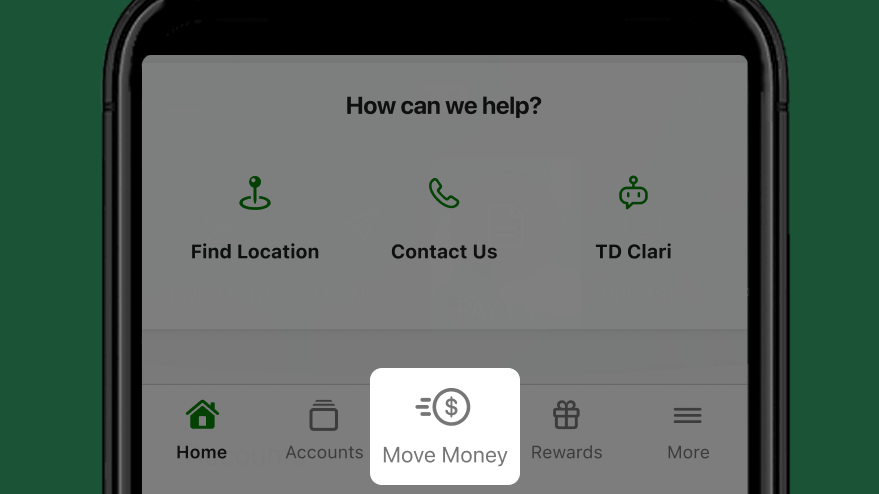
Select Move Money from the Navigation bar.
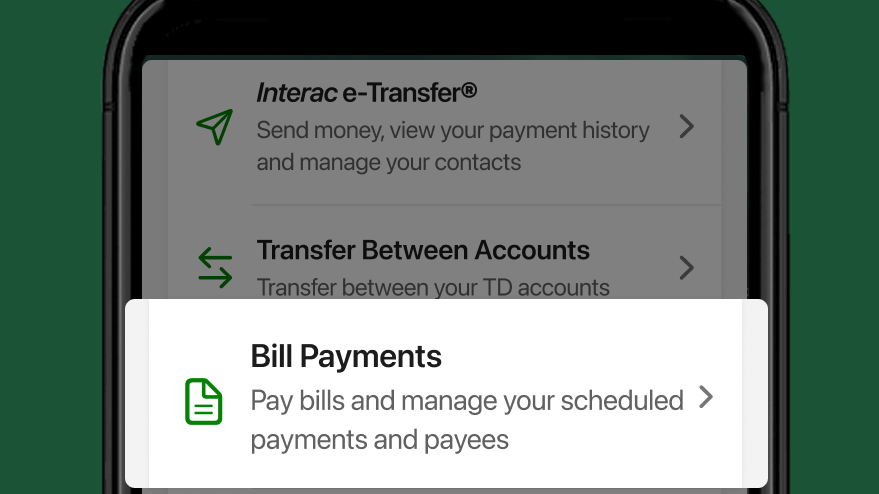
Select Bills Payments.
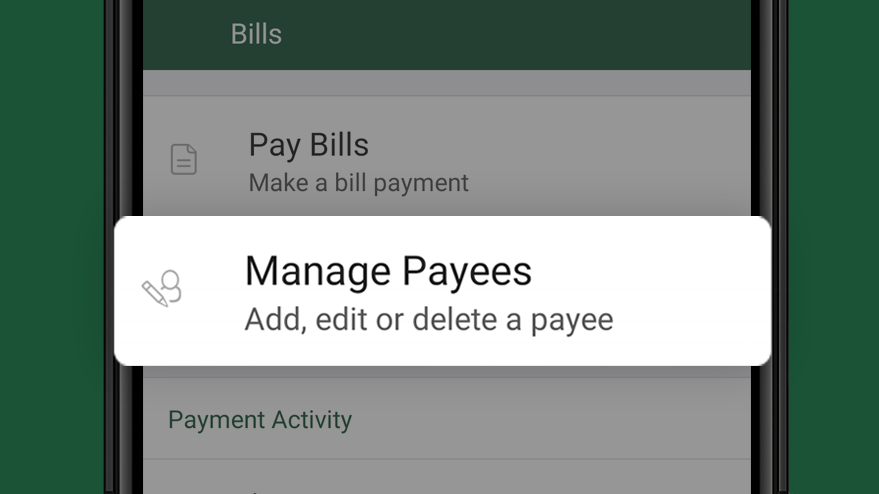
Select the Manage Payees option from the Bills screen.
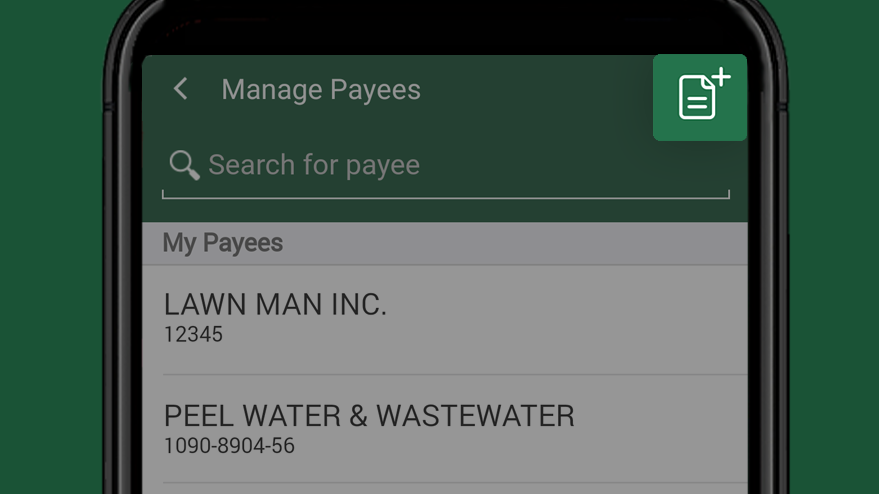
Select the Add icon in the top right corner of the screen.
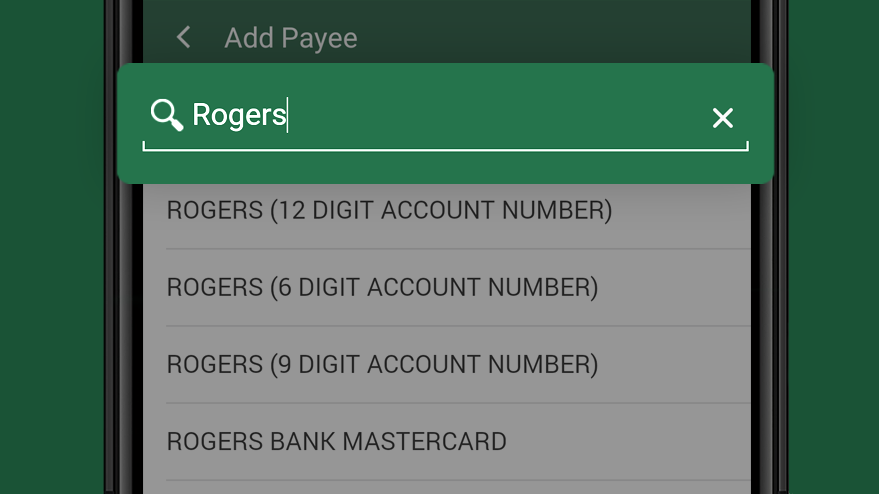
To add a payee, you'll need to find their official name (found on a bill or statement).
Type the name into the Search for payees field. Matching payees will begin to populate. Select the name of your payee.
If you can't find the name, enter related keywords in the search field.
If you still can't find the name, try a different payment method (Ex. in branch).
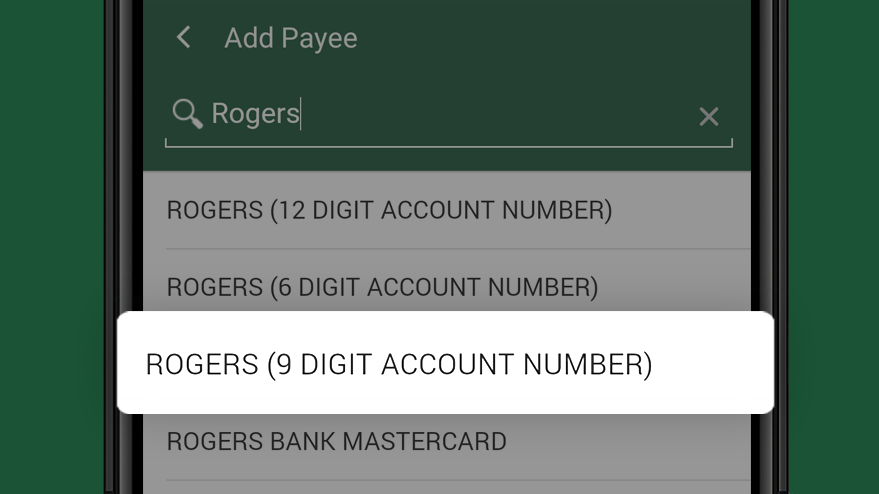
Select the company you'd like to add from the list.
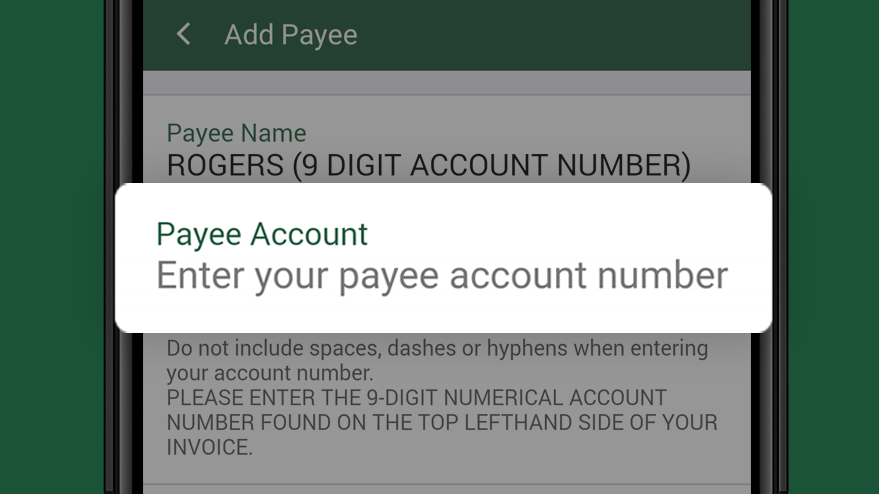
Enter your payee account number in the Payee Account field.
You'll find your account number on a bill or statement you've received from the company.
The Description field below is an optional field you can use to apply a personalized label to your payee account (Ex. Apartment Energy Bill).
When you're done, select the Continue button at the bottom of the screen.
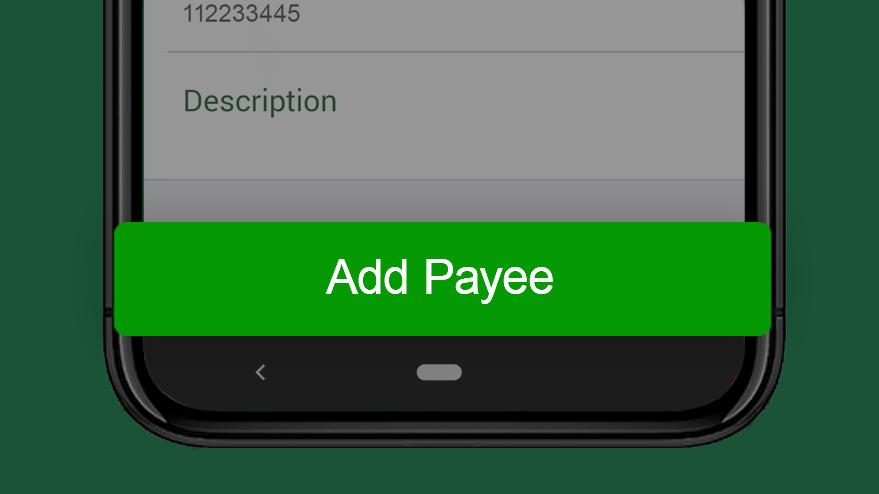
Review all the information to ensure that it's correct.
Select the < (back) icon to make any changes.
When your information is correct, select the Add Payee button.
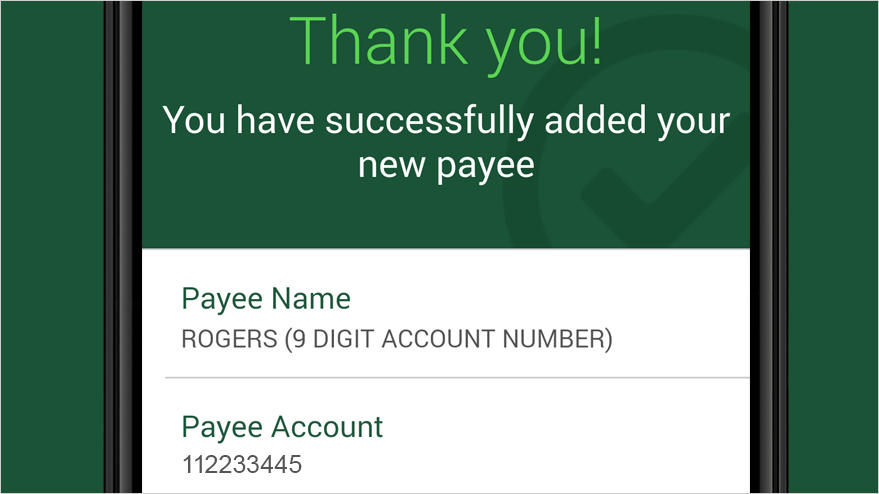
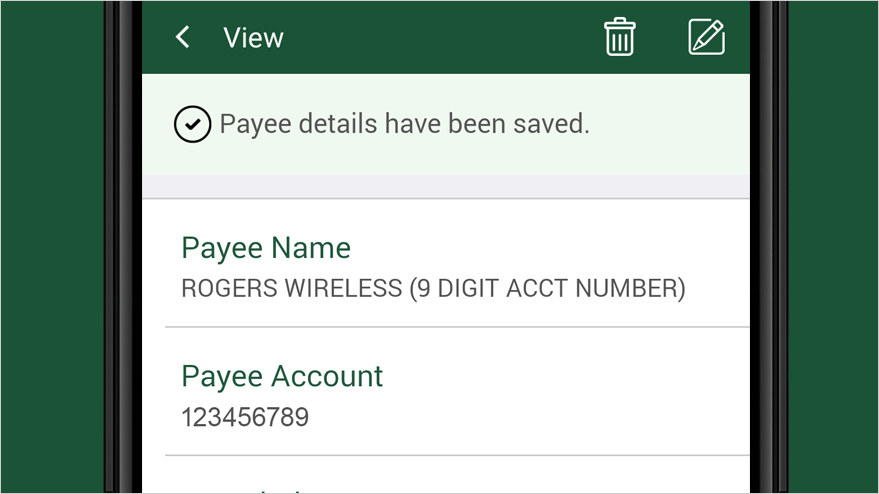
A message will appear confirming that your new payee has been added.
From here, you can send money to your new payee, add additional payees to your list, or return to the home screen.
Keep scrolling to learn how to edit payee details or skip ahead to Step 3: How to delete a Canadian payee.
Step 2: How to edit a Canadian payee

From the home screen, select Bills in the main menu.
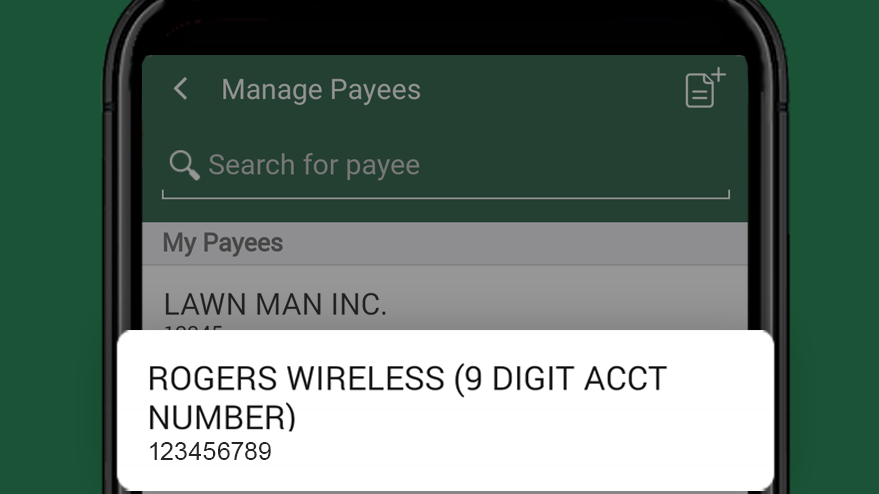
Then select the Manage Payees button.
Find the payee you'd like to edit.
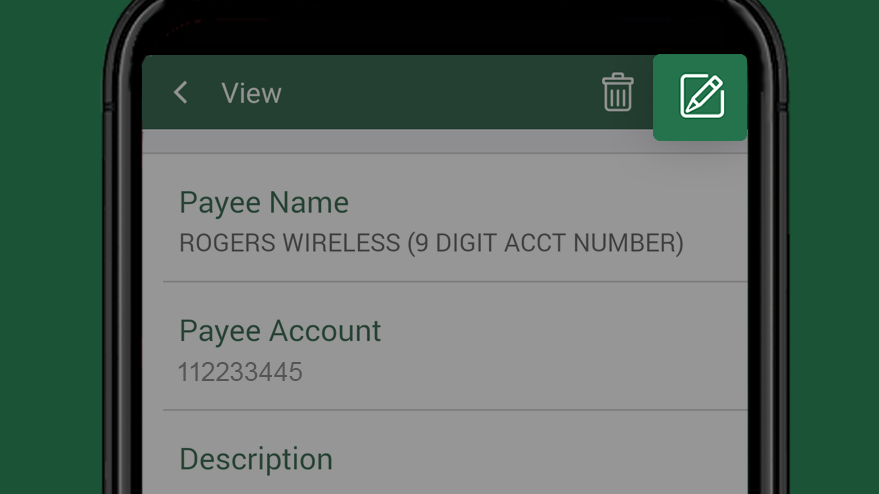
Select the Edit icon in the top right corner of the screen.
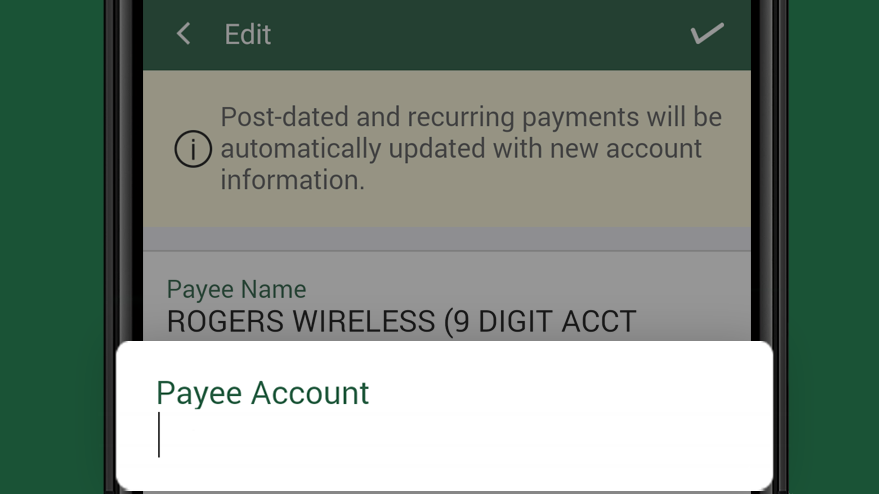
To change the account number associated with this payee, enter a new number into the Payee Account field.
To add or change your personalized label for this payee, enter your desired name in the optional Description field.
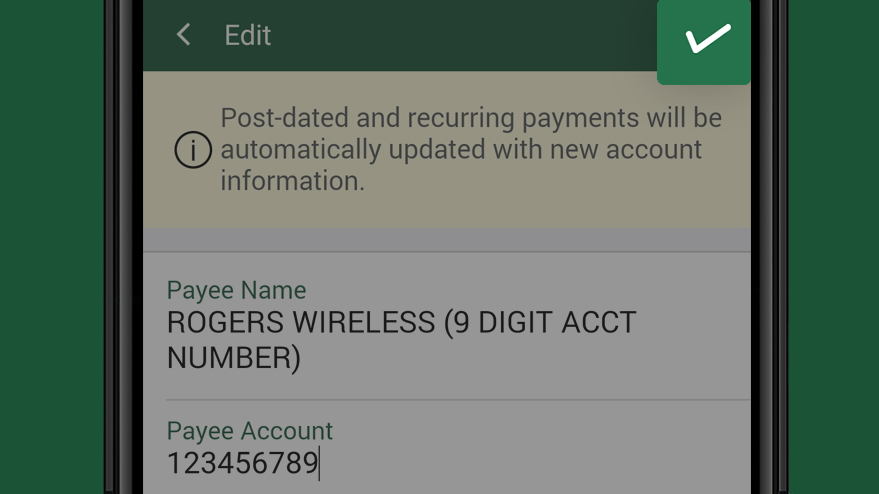
When you're done, select the check icon in the top right corner of the screen.
A message will appear, confirming that you've successfully edited your payee information.
From here, you'll be able to pay the payee you've just edited, or another payee on your list.
Keep scrolling to learn how to delete a payee.
Step 3: How to delete a Canadian payee
From the home screen, select Bills in the main menu.
Then select the Manage Payees button.
Select the payee you'd like to delete.
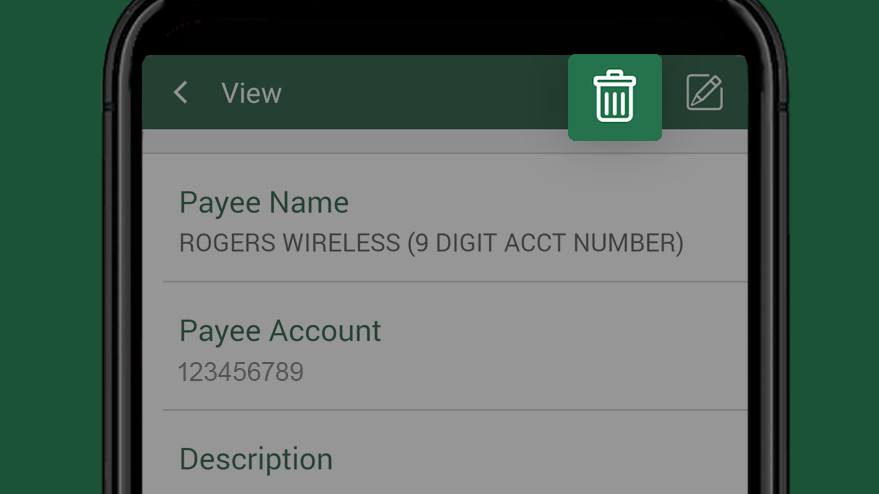
Select the Delete icon in the top right corner of the screen.
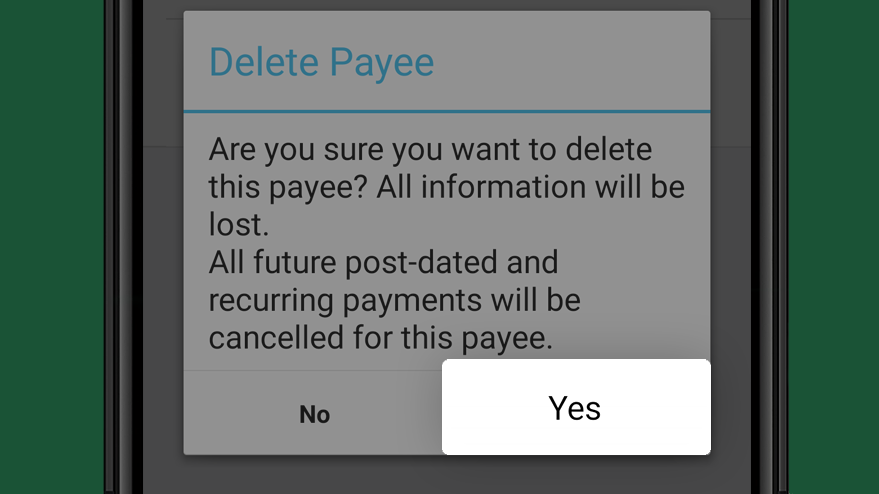
Note that any pending or future payments you have set for this payee will be cancelled. You'll need to make other arrangements for future payments you still owe.
Select the Yes button to confirm deletion.
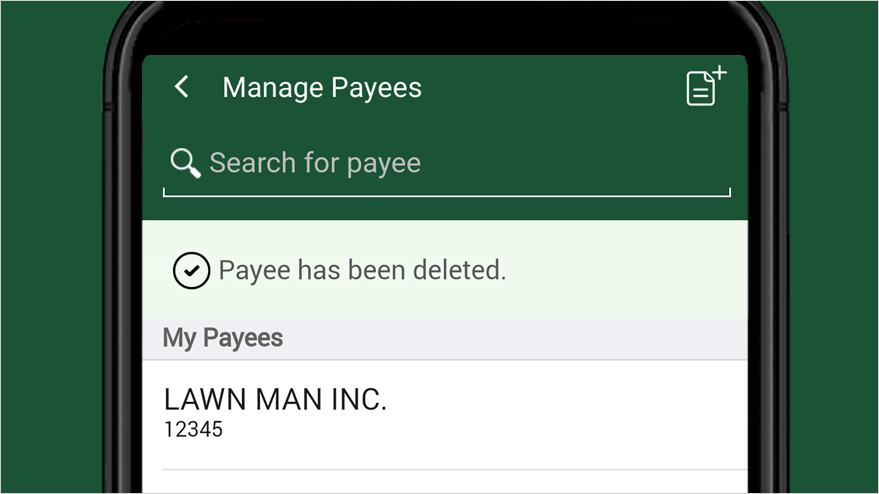
Notice that your deleted payee is no longer on the list of payees.
From here, you can delete, edit or add another payee, or return to the home screen.
Congratulations! You've completed this tutorial.